Choosing a subwoofer can be a very difficult but interesting task. When you're choosing a car sub, you need to know what you really want. It depends what kind of music you listen to, and other factors.
-Your Car Is Not A House-
*I have heard subwoofers in big rooms in houses. The subs for example were 8", and the rooms were large. The bass was terrible because it wasn't able to fill the room or anything. The vibrations and everything that the sub had to do was not there. The car is a completely different environment.
Bazooka makes popular subs, and a lot of people buy their 8" amplified tubes, I have heard these tubes in Jeep Wranglers and in a lot of SUVs, they can make the cars shake and vibrate, and get people to stare. Car subwoofers can also be as small as 6.5"... So as you can see, the bass reflects of more areas in a car, thus giving a drastically improved bass response because the smaller area. So you don't need to get a 10" or 12" neccassarily to get your car to vibrate.
-Tubes VS. Box Enclosures-
*Tubes - The only brand that makes tubes is Bazooka. Many of the tubes have built-in amplifiers, they are easy to move, and they are quite inexpensive. They are popular because of their simplicity and price. These will create bass, but not the cleanest or lowest hitting bass out there. So if you're into music, then these aren't for you. If you want something to just pound, then these are quite good. However, you can do better with box enclosures.
*Box Enclosures - Box enclosures are when you buy either a ported or sealed enclosure, and put in however many drivers the box can hold. You can get one that holds either one, two, or three. Many people uses sealed enclosures because they are the smaller one of the two, but I use a ported in my car. Unlike tubes, with boxes, you can add whichever brand of woofers you want, and your own amplifier. However, this can be a more difficult task than just putting in a tube. But, you get much more versatility. Whether you're setting up a budget or audiophile sub hook-up, a majority of the people will use box enclosures.
-The Different Materials-
*Different subwoofers are made out of different materials. Many of the more inexpensive and common subs are built out of paper cones. These will generally handle the job well, but there will be more distortion, but the price difference is quite large. Polypropylene is becoming quite of a popular polymer, it is higher quality than paper, and still quite inexpensive. The best of the new subwoofers are alluminum subs. I use a single alluminum Audiobahn 12" in my Pathfinder off of a Kicker amp, and I love it. The sound quality that it gives me is very clean and smooth. The surrounds around the voice coils are usually rubber. Other brands may use other types of surrounds, but rubber is still the most commonly used and most durable.
-Voice Coils-
*The more layers and space that you have, the better sound quality you get. There are two kinds of bass, clean bass and "ghetto bass". Clean bass subs include brands such as Nakamichi, McIntosh, Blaupunkt, Audiobahn, Infinity, and other higher end brands. They usually have dual-voice coils and give very clean bass. There are also such things as "ghetto subs" which can handle enormous amounts of power, such as 1000 Watt+ RMS, but their bass is very dirty and distorted, it's not good for real music. I've seen very expensive subs that have quadruple voice coils (Sony Mobile ES), but a majority of the high quality subs will have dual-voice coils, but you can definitly do with one.
-Driver Sizes-
*Well, as you can see, in the car an 8" sub will make the car vibrate and do everything that someone would want a subwoofer to do. However, the larger the subwoofer, it can get: Louder, cleaner, hit lower frequencies, and handle more power. If you've got a tight budget, an 8" will do the job, but if you're an audiophile or are really into music, then bass is would be very important to you. I think the ideal size for any subwoofer is 12" because it can hit the lowest notes without using all that much power. A 12" can certainly reach lower notes than an 8". If you can hear the difference in frequencies or need that "bang", then you should get a larger subwoofer. However, if you just want to fill in some lower notes but aren't expecting that much, then go for a 8" subwoofer or something like that. It would save you money.
-Amps and Power-
*The power of your amp should depend on the size of the driver or how much bass you want. I use a fairly powerful amp to power my Audiobahn. I know people that are car stereo crazy, and they power over 1000 Watts to some of their subs, but that is over-kill. It can break the glass on a car, and if the subwoofer is poorer quality, there is a huge amount of distortion. You should never exceed the RMS rating on your drivers, because one day your sub will go "pop!", and there will be nothing left. I think something around 200 Watts per driver should be enough for most people. Most amps that have much more power than that are over-kill I think.
-Finally-
*I hope that this review has helped you in finding the perfect subwoofer for your car. If you have trouble finding the right brand or anything, just look up consumer reviews or get advice from friends. My personal advice is that Audiobahn or Blaupunkt are both superb brands and you'll definitely get a lot for your money. But, most brands will make consumers happy. well, good luck!
Subwoofers

Friday, August 29, 2008
Installing A Car DVD Player
Items You'll need:
While each system is different and unique it is usually made up of three components:
the DVD player itself;
the car video monitor;
the sound system;
...and there are four main different types of installation that will present you with four different degrees of difficulty.
2 DIN system
DIN is an international standard for Car stereo / in-dash car entertainment units: 2 DIN simply means a standard double decker slot size.
This system is mounted in the car dashboard and will probably pose you the most difficulty, especially if you are installing it from scratch. But since double DIN car DVD systems also look the coolest, it is definitely worth the effort...
Two DIN car DVD systems are usually made up of a screen and DVD player, with the amplifier being built into the dashboard unit. You may find that you will need unit mounts and connectors to get the DVD player to be seated properly. Installation of this type of system requires a lot of re-wiring and, if the edges of the DVD player is too big or too small for a non-standard stereo space, you may even need to remodel the dash to make sure the unit fits snugly. Check the dimensions of your dashboard slot before buying your new car DVD!
You are probably going to need to run wires from the player to the speakers, any auxiliary input devices you might want to run (such as rear view cameras or bluetooth handsfree kits) as well as running a wire to both ends of the emergency break cable as its illegal to be able to operate the screen when the car is in motion unless its using a rear view camera. You will also need to wire the car DVD player to the power supply.
1 DIN system
This type of DVD player is similar to the 2 DIN in that it is mounted in the dash and is requires a great deal of wiring to get it installed. However, the 1 DIN DVD player only takes up half the space of the 2 DIN model and you may need to remodel the stereo port in the dash to make the DVD player fit snugly. Like the 2 DIN system it is made up of a screen (often retractable), amplifier and DVD player. Connections, wires and mounting brackets are always needed, but not always included.
Installation of this system is similar to that of the 2 DIN player.
Alternative Design Car DVD Players
This type of system is easier to install than the one, or two DIN DVD player but will still present you with some unique problems. While you won't have to fit the new electrical components to existing parts of the car you will still have to do a substantial amount of wiring to get the system hooked up to a power supply and/or stereo system. To install this type of car DVD player you will probably need wire, screws, glue or some other adhesive.
Car Headrest Monitor / DVD Player
Car Roof (Ceiling) Monitor
Car Sun Visor DVD Player
To install a headrest monitor you will need to remove the fitted headrest and run power and connection wires down through the hole... with most cars you should be able to take the cover off the bottom of the seat and put an unwound clothes hanger, or some other kind of wire, up through the slot to find the cable and fish it out... It then can be run under the carpet to the main car unit in the dash, or to another connection box in another location.
If you want to install a sun visor DVD player or overhead car DVD player you will need to consider two things: how to fix the player to the roof, and how to wire the DVD player so that the cables remain hidden. When mounting the overhead monitor you will need to install it in the middle of the car for ultimate strength. You will then need to conceal the wires wires underneath roof panels, running them from the player to the dashboard or power supply. This will require a lot of work as panels, the car's kick plate and even sometimes the seatbelt will have to be removed. Sun visor DVD players are a little easier to mount, as wires don't have to go so far to get to the power source/main adaptor. However they will still require some careful work removing and re-attaching panels.
Clip-on Car DVD players
This type of car DVD player is the easiest to install by far, and most flexible when it comes to moving from place to place. Clip-on car DVD players usually include sun visor DVD players, headrest DVD players and arm rest DVD players. You should be able to plug them into the cigarette lighter and strap them on to the allotted location.
Arm Rest Car DVD Player
Some Things To Consider
The information above is only a snippet of the material that you will need to help you through the installation process. Installing a car DVD player is not something to be undertaken lightly, especially when installing 1 DIN or 2 DIN car DVD players and overhead DVD players, which can be quite complicated to place and wire.
If you are serious about installing the DVD player and have the resources to do it it is important that you work methodically and carefully to avoid confusion or delays. Here are some things you might want to consider doing:
Research the project: Read and make sure you understand instructions for the components you are going to install. It might even be a good idea to go online and see if anybody has done any wiring plans for your particular car model.
Prepare for the task before you start: If you're taking on a major task, like installing a 1 DIN, 2 DIN or overhead DVD player, you will need to ensure you have all the necessary tools, accessories and cables. You will also need to give yourself at least a day without distractions to complete the job.
Remove existing components carefully and methodically: It is important that you don't lose or damage the old stereo unless you want your brand new unit to go with the car when you sell it. Laying out panels and parts in relation to their location on the car with all their screws on the panel will also prevent a 30-minute game of hunt the screw.
Make your work tidy: Try to make wires as tight as possible and prevent them from coiling up.
Do-It-Yourselfers who rush into car DVD installation projects might well find they are left with a time-consuming project which ends with an ugly and sometimes unsafe result.
There's nothing worse than a car with wires scattered all the way through it. A professional installer would make sure wires were tidied away somewhere behind the paneling of the car in nice neat straight lines. And, by taking time when installing the car DVD player yourself you can achieve similar results. It is also important to be aware of audio and visual problems that could come up from an hastily-assembled system. These might include flickering screens, black holes in sound, or rattling components amongst other things.
Incorrectly installed systems can, at their worst, be a hazard to the system, the car and yourself. If two wires are exposed they can short, creating a short-circuit that will, at the very least, turn your new stereo into an expensive brick and, at worst, fry the electrical circuit in your car. However, this is minor compared to the possibility of a car fire. Wire that has been piled too closely together for too long will fuse generating a temperature so hot it can combust causing a car fire.
Car DVD Installation Glossary
Changer= a CD changer; a device which holds several CDs and plays them on demand without having to eject or manually sort discs. Needless to say you can now get DVD changers too.
Crossover= a device that limits the range of frequencies sent to different speakers.
DIN= just stands for "Deutsches Institut für Normung" (DIN, the German Institute for Standardization), similar to ISO. The relevance for car DVD systems is that DIN means a standard sized dashboard slot, so 1 DIN means the device takes up one slot, and 2 DIN means the unit is ‘double-decker’ and uses the space of two slots.
DTS= "Digital Theater Systems" multichannel audio - basically another surround-sound standard like Dolby Digital 5.1.
DVD-A= DVD audio - just like a music CD, except more features and higher quality.
RF= Radio Frequency - probably talking about the wireless headphones. RF is generally better than Infra Red because you don’t have to be in the 'line of sight' of the transmitter.
Inverter= A power supply device you can plug into your dashboard cigarette lighter to supply AC to power-hungry devices.
In-dash= a device such as a DVD player installed in your dashboard, typically in the place of your old car radio.
GPS= Global Positioning System - in your this means navigation / map display software linking to a signal receiver and a readout on your screen.
GUI= Graphical User Interface - i.e. you can control the device using on-screen menus, often with a touchscreen
Headliner= the coverings that make the ceiling inside your car.
Car Headlining Diagram
Modulator= An FM transmitter that turns an audio input source, e.g. an MP3 player or audio line-in, into a radio signal for you to tune into using your car stereo.
Monitor= a screen that receives a signal from e.g. a DVD player or TV tuner - if a product is described as a Monitor it typically means it does NOT include the actual input player, e.g. DVD player unit. This is fine if you are buying that separately or you are building an in-car PC.
Motorized= where the TFT screen of a display, usually in a dashboard unit, automatically folds and slides inside its housing when not in use.
Power port= a grand name for the little dashboard cigarette lighter socket
RCA= those red and white (for audio) and yellow (for video) connectors used for e.g. connecting your DVD player to your home TV
RDS= Radio Display (/Data) System - the function where your radio can display rich data such as the name of the station or the track name, for FM radio signals.
Receiver =(confusingly enough) the device that transmits your video signal to a screen, e.g. a car DVD player
S-Video= high quality video connector often included on graphics cards, monitors, dvd players, and consoles as an alternative to RCA or VGA + Audio.
Sub= subwoofer
Versatile= a vague term that generally just means "feature rich", e.g. a car DVD player that also has a built-in GPS and connects with external storage devices.
- flat-head and Philips-head screwdriver
- pliers and a wire striping/crimping tool
- socket and ratchet set
- utility knife
- panel tool
- drill and bit set
- torque driver set
While each system is different and unique it is usually made up of three components:
the DVD player itself;
the car video monitor;
the sound system;
...and there are four main different types of installation that will present you with four different degrees of difficulty.
2 DIN system
DIN is an international standard for Car stereo / in-dash car entertainment units: 2 DIN simply means a standard double decker slot size.
This system is mounted in the car dashboard and will probably pose you the most difficulty, especially if you are installing it from scratch. But since double DIN car DVD systems also look the coolest, it is definitely worth the effort...
Two DIN car DVD systems are usually made up of a screen and DVD player, with the amplifier being built into the dashboard unit. You may find that you will need unit mounts and connectors to get the DVD player to be seated properly. Installation of this type of system requires a lot of re-wiring and, if the edges of the DVD player is too big or too small for a non-standard stereo space, you may even need to remodel the dash to make sure the unit fits snugly. Check the dimensions of your dashboard slot before buying your new car DVD!
You are probably going to need to run wires from the player to the speakers, any auxiliary input devices you might want to run (such as rear view cameras or bluetooth handsfree kits) as well as running a wire to both ends of the emergency break cable as its illegal to be able to operate the screen when the car is in motion unless its using a rear view camera. You will also need to wire the car DVD player to the power supply.
1 DIN system
This type of DVD player is similar to the 2 DIN in that it is mounted in the dash and is requires a great deal of wiring to get it installed. However, the 1 DIN DVD player only takes up half the space of the 2 DIN model and you may need to remodel the stereo port in the dash to make the DVD player fit snugly. Like the 2 DIN system it is made up of a screen (often retractable), amplifier and DVD player. Connections, wires and mounting brackets are always needed, but not always included.
Installation of this system is similar to that of the 2 DIN player.
Alternative Design Car DVD Players
This type of system is easier to install than the one, or two DIN DVD player but will still present you with some unique problems. While you won't have to fit the new electrical components to existing parts of the car you will still have to do a substantial amount of wiring to get the system hooked up to a power supply and/or stereo system. To install this type of car DVD player you will probably need wire, screws, glue or some other adhesive.
Car Headrest Monitor / DVD Player
Car Roof (Ceiling) Monitor
Car Sun Visor DVD Player
To install a headrest monitor you will need to remove the fitted headrest and run power and connection wires down through the hole... with most cars you should be able to take the cover off the bottom of the seat and put an unwound clothes hanger, or some other kind of wire, up through the slot to find the cable and fish it out... It then can be run under the carpet to the main car unit in the dash, or to another connection box in another location.
If you want to install a sun visor DVD player or overhead car DVD player you will need to consider two things: how to fix the player to the roof, and how to wire the DVD player so that the cables remain hidden. When mounting the overhead monitor you will need to install it in the middle of the car for ultimate strength. You will then need to conceal the wires wires underneath roof panels, running them from the player to the dashboard or power supply. This will require a lot of work as panels, the car's kick plate and even sometimes the seatbelt will have to be removed. Sun visor DVD players are a little easier to mount, as wires don't have to go so far to get to the power source/main adaptor. However they will still require some careful work removing and re-attaching panels.
Clip-on Car DVD players
This type of car DVD player is the easiest to install by far, and most flexible when it comes to moving from place to place. Clip-on car DVD players usually include sun visor DVD players, headrest DVD players and arm rest DVD players. You should be able to plug them into the cigarette lighter and strap them on to the allotted location.
Arm Rest Car DVD Player
Some Things To Consider
The information above is only a snippet of the material that you will need to help you through the installation process. Installing a car DVD player is not something to be undertaken lightly, especially when installing 1 DIN or 2 DIN car DVD players and overhead DVD players, which can be quite complicated to place and wire.
If you are serious about installing the DVD player and have the resources to do it it is important that you work methodically and carefully to avoid confusion or delays. Here are some things you might want to consider doing:
Research the project: Read and make sure you understand instructions for the components you are going to install. It might even be a good idea to go online and see if anybody has done any wiring plans for your particular car model.
Prepare for the task before you start: If you're taking on a major task, like installing a 1 DIN, 2 DIN or overhead DVD player, you will need to ensure you have all the necessary tools, accessories and cables. You will also need to give yourself at least a day without distractions to complete the job.
Remove existing components carefully and methodically: It is important that you don't lose or damage the old stereo unless you want your brand new unit to go with the car when you sell it. Laying out panels and parts in relation to their location on the car with all their screws on the panel will also prevent a 30-minute game of hunt the screw.
Make your work tidy: Try to make wires as tight as possible and prevent them from coiling up.
Do-It-Yourselfers who rush into car DVD installation projects might well find they are left with a time-consuming project which ends with an ugly and sometimes unsafe result.
There's nothing worse than a car with wires scattered all the way through it. A professional installer would make sure wires were tidied away somewhere behind the paneling of the car in nice neat straight lines. And, by taking time when installing the car DVD player yourself you can achieve similar results. It is also important to be aware of audio and visual problems that could come up from an hastily-assembled system. These might include flickering screens, black holes in sound, or rattling components amongst other things.
Incorrectly installed systems can, at their worst, be a hazard to the system, the car and yourself. If two wires are exposed they can short, creating a short-circuit that will, at the very least, turn your new stereo into an expensive brick and, at worst, fry the electrical circuit in your car. However, this is minor compared to the possibility of a car fire. Wire that has been piled too closely together for too long will fuse generating a temperature so hot it can combust causing a car fire.
Car DVD Installation Glossary
Changer= a CD changer; a device which holds several CDs and plays them on demand without having to eject or manually sort discs. Needless to say you can now get DVD changers too.
Crossover= a device that limits the range of frequencies sent to different speakers.
DIN= just stands for "Deutsches Institut für Normung" (DIN, the German Institute for Standardization), similar to ISO. The relevance for car DVD systems is that DIN means a standard sized dashboard slot, so 1 DIN means the device takes up one slot, and 2 DIN means the unit is ‘double-decker’ and uses the space of two slots.
DTS= "Digital Theater Systems" multichannel audio - basically another surround-sound standard like Dolby Digital 5.1.
DVD-A= DVD audio - just like a music CD, except more features and higher quality.
RF= Radio Frequency - probably talking about the wireless headphones. RF is generally better than Infra Red because you don’t have to be in the 'line of sight' of the transmitter.
Inverter= A power supply device you can plug into your dashboard cigarette lighter to supply AC to power-hungry devices.
In-dash= a device such as a DVD player installed in your dashboard, typically in the place of your old car radio.
GPS= Global Positioning System - in your this means navigation / map display software linking to a signal receiver and a readout on your screen.
GUI= Graphical User Interface - i.e. you can control the device using on-screen menus, often with a touchscreen
Headliner= the coverings that make the ceiling inside your car.
Car Headlining Diagram
Modulator= An FM transmitter that turns an audio input source, e.g. an MP3 player or audio line-in, into a radio signal for you to tune into using your car stereo.
Monitor= a screen that receives a signal from e.g. a DVD player or TV tuner - if a product is described as a Monitor it typically means it does NOT include the actual input player, e.g. DVD player unit. This is fine if you are buying that separately or you are building an in-car PC.
Motorized= where the TFT screen of a display, usually in a dashboard unit, automatically folds and slides inside its housing when not in use.
Power port= a grand name for the little dashboard cigarette lighter socket
RCA= those red and white (for audio) and yellow (for video) connectors used for e.g. connecting your DVD player to your home TV
RDS= Radio Display (/Data) System - the function where your radio can display rich data such as the name of the station or the track name, for FM radio signals.
Receiver =(confusingly enough) the device that transmits your video signal to a screen, e.g. a car DVD player
S-Video= high quality video connector often included on graphics cards, monitors, dvd players, and consoles as an alternative to RCA or VGA + Audio.
Sub= subwoofer
Versatile= a vague term that generally just means "feature rich", e.g. a car DVD player that also has a built-in GPS and connects with external storage devices.
How to remove a Car Stereo in your Ride
Things You Need:
Screw driver
Step 1
The first thing that you’re going to need to do is remove the faceplate that surrounds the stereo. This is the hard plastic outer surrounding your radio, it should be placed just below your air vents. If it seems hard to budge or remove, take the side of a butter knife or a flathead screw driver and pry it up. Just place the tool at an angle and push down, the retaining clips should pop right up.
Step 2
Once you’ve removed the faceplate surrounding the stereo, you’re going to have to remove the holding screws that secure the stereo in place. Take your screw driver (make sure it fits the screws) and began to unscrew. Be sure to hold the stereo in place while unscrewing so that it doesn’t just fall out. Once done unscrewing, save the screws! I can’t stress this enough, save the screws because your new stereo might not come with any or they may not fit. So best bet is to keep the old ones that you know will work.
Step 3
Now that the screws are out, firmly grab the radio with both hands and pull it out slow. Don’t just yank it out because there are wires connected to the back of it. When you get the stereo all the way out you should see two wires. One will be the antennae and the other will be a group of multi-colored wires held together by a retaining clip. Pull out both wires, the antennae should come out with no hesitation. However; you may have to push the retaining clip on both sides to pull out the wiring group. If retaining clip fails to come out just get the same flathead screw driver or butter knife and pry it out at an angle.
(Point of the retaining clips is to keep stereo securely in place so it doesn’t rattle and move around everywhere while you’re driving)
Thursday, April 24, 2008
What Type of Subs Should I Buy?
Well, if you ask me, I would recommend you purshase either Kickers or Rockford Fosgates. The reason why i resommend these two types of subs, is because I have had some great experience with them. My last car had two 12 inch Fosgates, and let me tell you. They most definitely rocked my entire block. I currently have 2 12 inch Kickers and they sound GREAT! I love them because they can handle the high, low, and mid bass.
Tuesday, April 22, 2008
How to Install Speakers in Your Car
Installing new speakers is the single most cost-effective improvement you can make to your vehicle's audio/video system. Not only are aftermarket speakers relatively inexpensive, they are typically not difficult to install.
You can install many of the speakers we sell with a few tools that you probably have around your house. The free brackets, wiring harnesses, and detailed instructions that Crutchfield will send you with the speakers you buy from us (when available for your specific vehicle) will save you time and effort.
What you'll need to complete the job
Each car presents its own specific type of installation issues, varying on factory speaker locations, mounting depth and height, and the vehicle's factory wiring. Many installations are straightforward — a screwdriver might be all that you require to complete the job. Other installations can be more involved, particularly if you're installing component speakers. Your MasterSheet™ instructions from Crutchfield will specify the exact tools you need, and walk you through the process step-by-step.
The tools you'll need might include, but aren't limited to:
a variety of screwdrivers (Phillips, stubby Phillips, flat-blade, and magnetic or offset screwdrivers)
Torx drivers and bits
drill (with screwdriver and bits)
Allen wrenches
socket wrench set
wire cutter/stripper tool
soldering iron and solder
crimping tool and connectors
panel removal tool
retaining clip remover (or a screwdriver covered with a shop rag)
a file
electrical tape
exacto knife
General Tips
Every car is different, so you may encounter issues that differ from the ones described here. Here are a few general tips to keep in mind as you plan your speaker installation.
Types of installations
After you identify your vehicle on our Vehicle Selector and select the mounting location, you'll see which speakers fit your car. Speakers labelled "E-Z" will fit in the factory speaker openings and use the factory grilles and brackets. The magnet fits the available space and the tweeters won't interfere with your grilles.
Other sizes — labelled "P" — fit with the aid of a mounting bracket (free with speaker purchase), or with minor modifications (such as drilling new screw holes, cutting a small area of metal or pressboard, or filing cardboard or plastic to make room for a speaker that is larger than the factory opening).
Component speaker systems include separate woofers, tweeters, and crossovers. The component woofers will install in your factory speaker locations, but the tweeters usually require custom installation. This typically involves drilling holes in the door panels or dash, depending on where you choose to mount the tweeters.
If Q-Logic makes a Q-Form replacement kick panel for your vehicle, you can mount both the woofer and tweeter in the custom-fit enclosure. Depending on the vehicle, you may have to bend or relocate the parking brake pedal or other parts. Enter your vehicle in the Vehicle Selector and click on the Kick Panel Enclosures tab to see specific information on installation details for your vehicle.
When you install your new speakers, you'll have a set of free instructions specific to your vehicle, as well as free Crutchfield speaker wiring harnesses (when available), which eliminate the need for splicing.
Replacing dash speakers
Most dash speakers are easily replaced by removing the grilles, which are held down by screws or friction fittings. You might need to use a 90-degree (offset) screwdriver to get at the screws near the windshield.
If the grille is held in place by friction fittings, carefully pry it up. To avoid scratching or cracking the surrounding dash as you do this, it's a good idea to put something broad and flat (like a putty knife) underneath whatever you're using to pry up the grille.
If the application of slight pressure is not enough to remove the grille, proceed cautiously. In some cases the grille is secured from below by screws, or by plastic studs which can break with excessive force. In such cases, the entire dash panel may need to be removed.
Remove the old speakers, making sure to note the polarity of each terminal. (The speaker's positive terminal is the larger of the two, and usually is marked with a "+" or a colored dot.) Use your wiring harness to attach the new speaker, or solder or crimp the connections as your installation requires.
Don't use electrical tape to secure the connections. Because your dash is subject to more temperature and climate extremes than almost any other part of your vehicle's interior, the electrical tape will deteriorate in short order, and you'll run the risk of a loose connection.
Replacing door speakers
In many cars, door speakers are the easiest to replace. In many newer cars, manufacturers have notched a slot into the edge of the grille. All you have to do is take a screwdriver, pop out the grille, and unmount the factory speaker.
Some grilles are mounted by screws or friction fittings, and require you to remove the screws or pry the grille to remove the speaker. There are three basic steps to replacing a door speaker in a vehicle like this.
Step 1. Remove the grille and factory speaker. Be gentle with the speaker, since it probably is attached to a wiring harness and you might want to reinstall the factory speakers if you sell the car later. Some manufacturers also use a sealant or foam when they first mount the speaker — you might need to cut through that material with a utility knife.
For many speakers, Crutchfield supplies plug-in harnesses to simplify wiring.
-->
Step 2. Unplug the factory wiring harness, and attach the Crutchfield wiring harness to your new speaker's terminals, again making sure that the polarity is correct. With the wiring harness connected to your new speaker, simply plug the other end of the harness into the factory wiring harness. If a wiring harness is unavailable, you will need to solder or crimp the connections. Test the speaker before you put it into place.
Step 3. Check one last time to be sure that all of your wiring is secure, then screw the new speaker into place in the factory mounting and re-attach the factory grille.
If you have to remove the door panel
In some cars, you'll have to remove the door panels to get the factory speakers out. As always, your Crutchfield instructions will walk you through this procedure step by step. Start with the window crank. Some are secured with a screw at the pivot, which is sometimes hidden by a piece of snap-on trim.
A panel tool can help you remove window cranks without damaging your vehicle's interior.
Most, however, are held in place by a spring clip. We carry an inexpensive retaining clip tool designed to remove this clip, but with a little more effort you can also do it using a small flat-head screwdriver. Depress the surrounding door panel, look behind the window crank, and rotate the handle until you see the spring clip. Then gently push it off with the screwdriver.
After removing the window crank, remove the armrest (usually secured with a few Phillips head screws) and any trim around the door handle. The only thing holding the door panel on now should be a half dozen friction fittings and possibly a few more screws.
With all the screws removed, start at a bottom corner and pull the panel straight out. Use our trim panel tool or a large flat head screwdriver. Once the corner is loose, work across the bottom of the door panel and up both sides, again being careful not to use too much force. With the bottom and sides loose, the panel should now be hanging by some trim that sticks down into the window well. Lift straight up and it should come free. Replace the speakers as described in the previous section.
Monday, April 21, 2008
How To Hook Up Your Own Subs
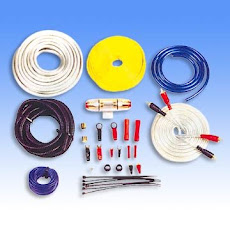
First thing first. I've been hooking up sounds for not only myself but my freinds and my freinds friends. It's relatively easy if you ask me. Before I get into detail about how to hook up your sounds, you first need to know everything to purchase. Below is a list of items you must have in order to connect your subwoofers.Items needed to hook up Subs:
1) Power kit w/(RCA) cords
2) Subwoofers & Encloser/Box
3) Amplifier(s)
Nextly, once you have purchased all of the required items, you are ready to hook up everything to your car stereo. O.K. inside the Power Kit are: the power wire, ground wire, RCA wires, speaker wires, and remote wire (this wire sends the signal from the radio to the subwoofers). I strongly suggest you connect the power wire and the ground wire last. This will make sure that you don't blow anything. I've been doing this for a very long time and I haven't blown a amp or speaker, so you will be just fine. The First wires you want to connect is the remote wire. This wire is very small. It connects to the small terminal on the amp and connects to the AC cord in the back of your stereo. Since your already connecting the AC cord in the back of your stereo, you minus well connect the RCA cords as well. This is extremely easy. The next wires you want to connect is your speaker wires. This wires are positive and negatve (Red&Black). So make sure you connect the positve with positive and negative with negative. This is very easy, almost common sense. After your down with that. you can connect your power (red thick) wire to your amp, (NOT THE BATTERY JUST YET). This connects to the power terminal on your amp. You should have no problem finding this. After that connect your ground wire (black) to the amp. It will say ground on the terminal. Once this has been done you must find a spot in your trunk to bolt down the ground wire. If your trunk has carpet, your going to have to pull a section up and you'll need bolt the end of the ground wire (black) that is not connected to the amp into a metal part of your trunk. After that, you are ready to connect the power wire (red thick) to the positive terminal on your car's battery. Howerver, for doing so, you must connect the fuse that comes in the kit. It slides into the fuse holder on the power wire (red think) and twist together. Make sure you twist it very tight together. Once that has been done, you are ready to test your speakers out.
If you have any questions please post on my blog.Good luck, and I hope that I was helpful. Thanks for visiting my site, and please refer your friends. Have fun Bumping your music.
-Juan-
Here's a couple of Tips that always seem to help me:
Work with a experienced buddy to help troubleshoot and save time.
Use a amplifier that is not cheap because the cheap ones blow up when you crank the volume or use them for long periods of time.
Same goes for the subs.
Make sure you wire the subs to the correct ohmage, some amps cannot handle certain ohm loads, be very careful!
Many car audio stores do installation for you if you are unsure or inexperienced.
Also some Warnings:
Always disconnect the negative battery terminal when working with automotive electronics.
Be careful with razor blades they are sharp and can severely cut you.
Always wear safety glasses they could save your eyes.
Always fuse your positive line or fire/ damage to your unit could result.
Always work with a experienced buddy.If you can't do it just take it to a trained professional. They know what they're doing and they wont blow up your unit or car.
How to Install Subwoofer Encloser in Your Car
Things You’ll Need:
Wire cutters
Screwdriver set
Electrical tape
Wire strippers
New car stereo (head unit)
Muste be ready for the Job
STEPS:
1. Purchase a new stereo. Make sure to get one that will fit properly into the slot for your old one. In addition, when buying a new car stereo you may be able to get a wiring harness that is specific to both your car's make and model AND the new stereo. Buy one of these if you can because it will make the wiring a snap, literally!
2. Collect these tools and materials: screwdrivers, wire strippers, wire cutters and electrical tape.
3. You will also need a guide to removing the dash panel of your car that shows how to properly remove your old radio.
How to Remove your Old Stereo Steps:
1. Disconnect the ground (negative) cable from your battery. NEVER work on the electrical system of your car with this connected.
2. Remove the dash panel that covers your stereo. Unscrew and slide out your old head unit. There will either be one single plug with lots of wires that connects to the back of it or a bunch of individual wires. If there are a bunch of single wires going into the back of the stereo do not detach them yet since you will want to do them one at a time to avoid confusion.
3. Plug the connector into your new wiring harness, if your were able to get a wiring harness for your car. This will then plug right into the back of your new stereo. If you did this you can skip the next section.
How to Connect the Wiring Manually Steps:
1. Connect each wire yourself if your were unable to obtain a wiring harness to install your car stereo.
2 Connect the positive wire from each speaker to the positive connector on the back of the stereo first. Then connect the negative wire from each speaker to the negative connector on the back of the stereo. If there is only one wire coming from the speakers, the speakers are grounded at the chassis. In this case you will need to install new speaker wiring.
3. Connect the ground (-/black) wire of the stereo to a screw or bolt near where the radio is mounted in the dash. Make sure the wire is attached to metal, not plastic or fiberglass.
Step4Connect the 12 constant and ignition power wires (both +/red) to the new stereo. Refer to your stereo's installation manual to make sure these go to the correct places.
How to Putt in the Car Stereo Steps:
1. Now you should have a nice single connector that hooks to all the proper wires in your car--either from the wiring harness you purchased or the one that came with your stereo that you have now connected all the proper wires to.
2. Slide your new stereo into the mounting bracket that came with it. In some rare cases you may have to use the bracket from your old car stereo.
3. Plug the harness connector into the back of your new stereo. There should be only one lone ire left from your old stereo now. This is the antenna. Plug it into your new unit. There may also be a power antenna wire which you will need to connect.
4. Slide your new car stereo into the slot in the dash. Don't screw it in yet; you'll need to test it first.
5. Reconnect the negative cable of your car to the battery.
6. Turn your car on and power up your new stereo. Put some music on and listen to all your speakers to make sure everything works.
7. Screw your new car stereo into place and put the dash cover back on.
If you have any questions, please fill free to post a note on this page. Thanks and Enjoy!
Subscribe to:
Posts (Atom)
